The standard earning flows cover the most common ways customers earn points: purchases, follows, profile completion, store check-ins. Custom earning flows give you 5 free slots to reward anything else, like watching a product video, completing a survey, attending an in-person event, or any action your team can think of.
You decide what customers see, what they earn, and how points get credited.
Go to Loyalty → Ways to earn and select Add custom earning flow from the list.

How Many Custom Flows You Can Create 
You get 5 slots per program, labeled CUSTOM_1 through CUSTOM_5. The creation entry disappears once all 5 are in use. Deleting a custom flow frees its slot so a new one can take its place.
The CUSTOM_N identifier is the technical handle you use when triggering a flow from outside JeriCommerce, like from Shopify Flow or the API. The customer never sees it.
Set Up a Custom Flow 
Open a new slot
Click Add custom earning flow. JeriCommerce picks the next available slot for you.
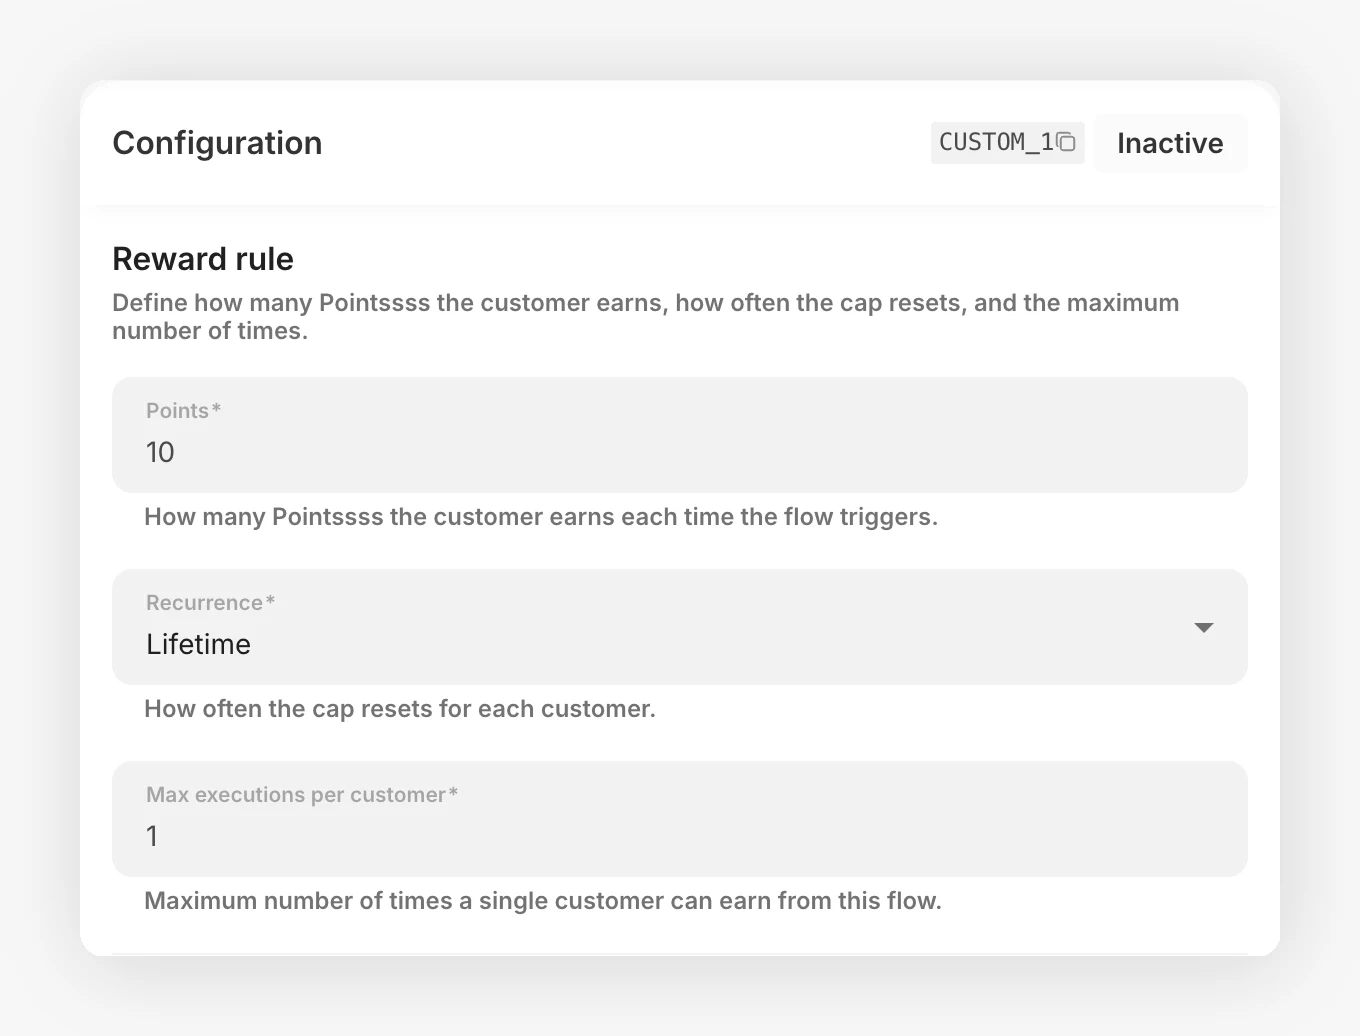
Set the reward rule
In the Reward rule section, choose three things:
- Points: how many points the customer earns each time the flow runs.
- Recurrence: how often the cap resets. Options are Lifetime, Daily, Weekly, Monthly, Quarterly, Every 6 months, and Yearly.
- Max executions per customer: how many times the customer can complete the flow inside that window.
For a one-time reward (like completing a profile survey), pick Lifetime with 1 execution. For a repeatable action (like a weekly check-in), pick Weekly with 1 execution.
Write the customer-facing copy
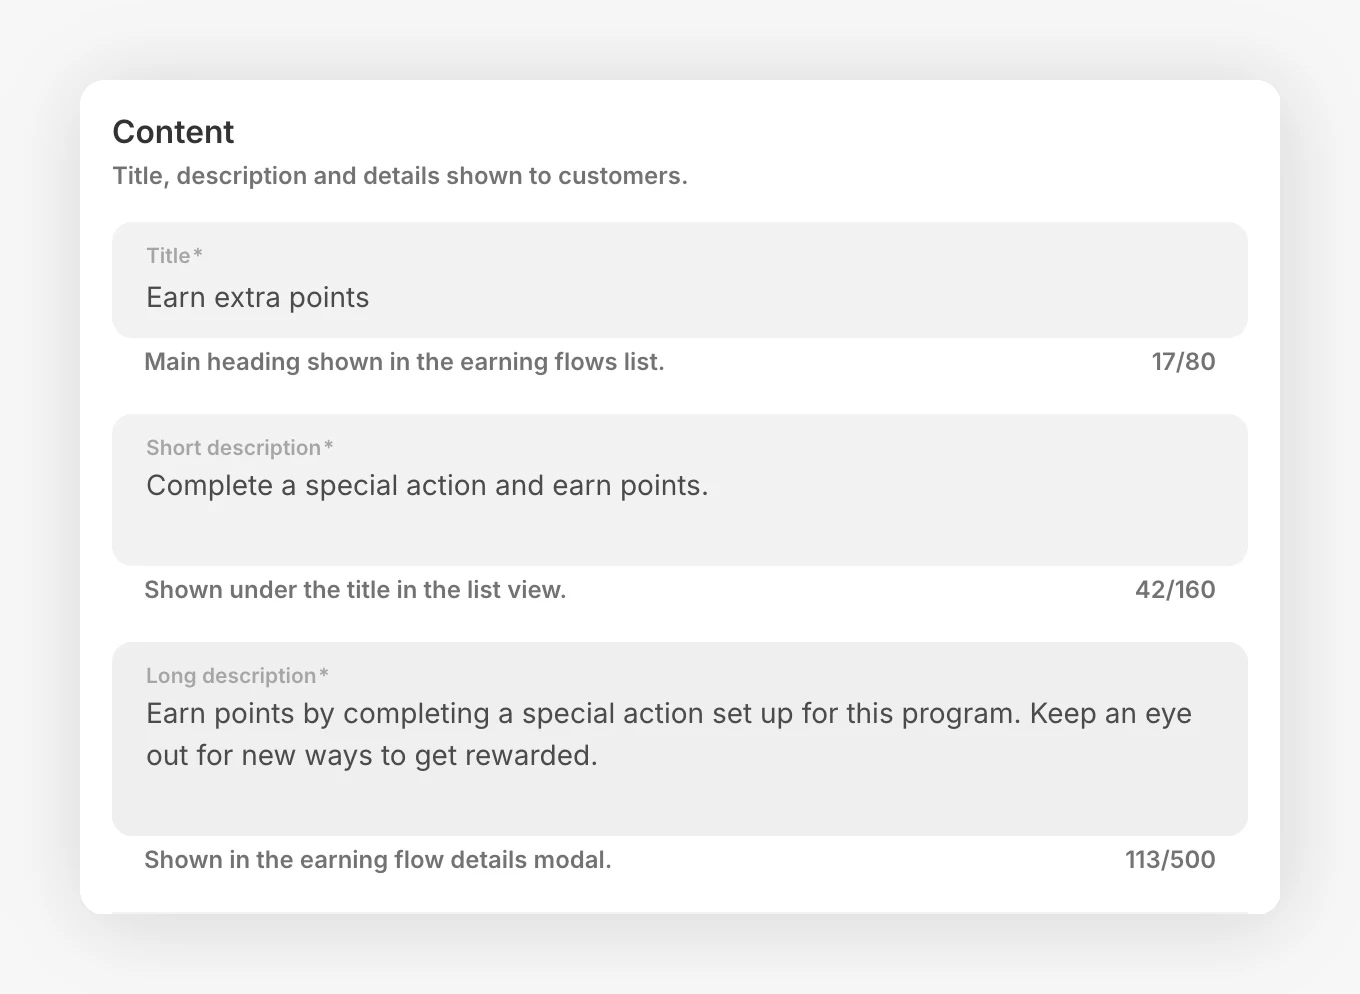
In the Content section, fill in the fields customers see in their loyalty web app:
- Title: the heading for the earning flow.
- Short description: the brief text shown on the earning flow card.
- Long description: the additional details shown when customers open the flow.
If you run a multi-language program, fill in each locale. JeriCommerce can auto-translate the copy on first save when other locales are turned on.
Choose how the points get credited
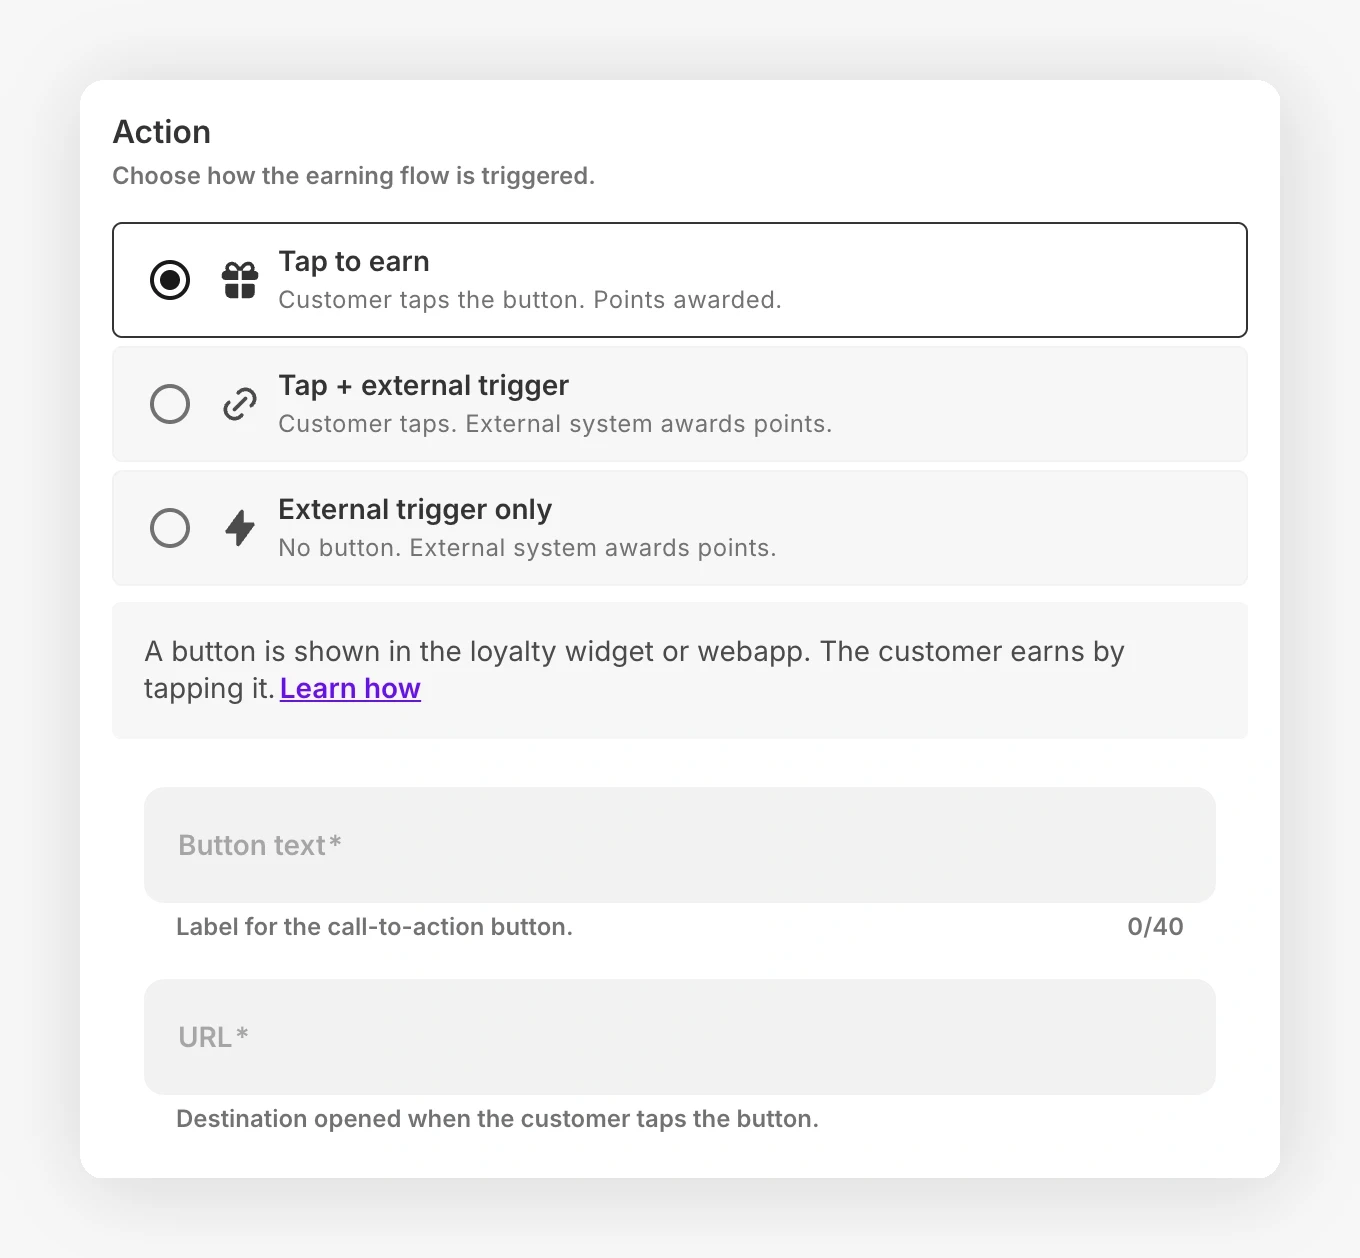
Under Action, choose one of the three options below. Set the button text and URL there when the option includes a button.
Save and activate
Set Status to Active, then click Save in the save bar at the top of the page. The flow shows up in the customer webapp the next time they open it.
Action Modes 
The action mode tells JeriCommerce how the points are credited. Pick the one that matches your use case.
Tap to earn 
The customer sees a button on the action card. Tapping the button credits the points and opens the URL you set, both in the same action.
Use this mode when the action is self-contained, like:
- Visit a landing page about a new collection
- Read a blog post or guide
- Open a hidden gift in the loyalty webapp
The customer earns the points the moment they tap, up to the recurrence limit you set. JeriCommerce enforces the limit server-side, so a customer cannot earn more than their cap even if they tap repeatedly.
Tap and external trigger 
The customer sees a button that opens the URL you set, but tapping it does not credit the points. The points still come from an external trigger.
Use this mode when the button leads the customer to where the action happens, but the action itself has to be verified somewhere else. For example:
- Button label: Leave a review. URL: link to your review form. Trigger: a Shopify Flow that fires when the review is published.
- Button label: Watch the launch event. URL: link to the live stream. Trigger: an API call from your video platform when watch time crosses a threshold.
This avoids the trap of crediting points for a click that did not lead to the action actually being completed.
External trigger only 
No button is shown on the card. The points get credited from outside JeriCommerce, either from a Shopify Flow workflow, a Klaviyo webhook, or your own backend through the API.
Use this mode when the proof of action lives in another system, like:
- Reward a customer after they leave a product review (triggered by a review app webhook in Shopify Flow)
- Reward a customer after they attend an in-store event (triggered manually from your CRM)
- Reward a customer after they complete a post-purchase survey (triggered when the survey tool calls your endpoint)
The card still shows in the customer webapp with the subtitle and points value, so customers know the action exists. They just do not see a button.
The editor shows the flow's identifier (CUSTOM_1, CUSTOM_2, and so on) in the Configuration header. You will need it to wire up the trigger. See the Shopify Flow Execute earning flow action or the API reference for executing a custom flow.
Trigger a Custom Flow from Outside JeriCommerce 
If you picked Tap and external trigger or External trigger only, you have three ways to credit the points.
From Shopify Flow
Use the **Execute earning flow** action inside any Shopify Flow. Pass the flow identifier (e.g. `CUSTOM_1`) and the customer email.
From Klaviyo
Add a webhook action to any Klaviyo Flow. The webhook builder generates the URL and JSON body for you, ready to paste.
From the API
Call the execute endpoint from your own backend or any tool that can make HTTP requests.
All three paths respect the recurrence and max-executions rules you set in the editor, so you cannot accidentally over-credit a customer by triggering twice.
What the Customer Sees 
Custom earning flows are pinned to the top of the customer's "ways to earn" list, above the standard flows.
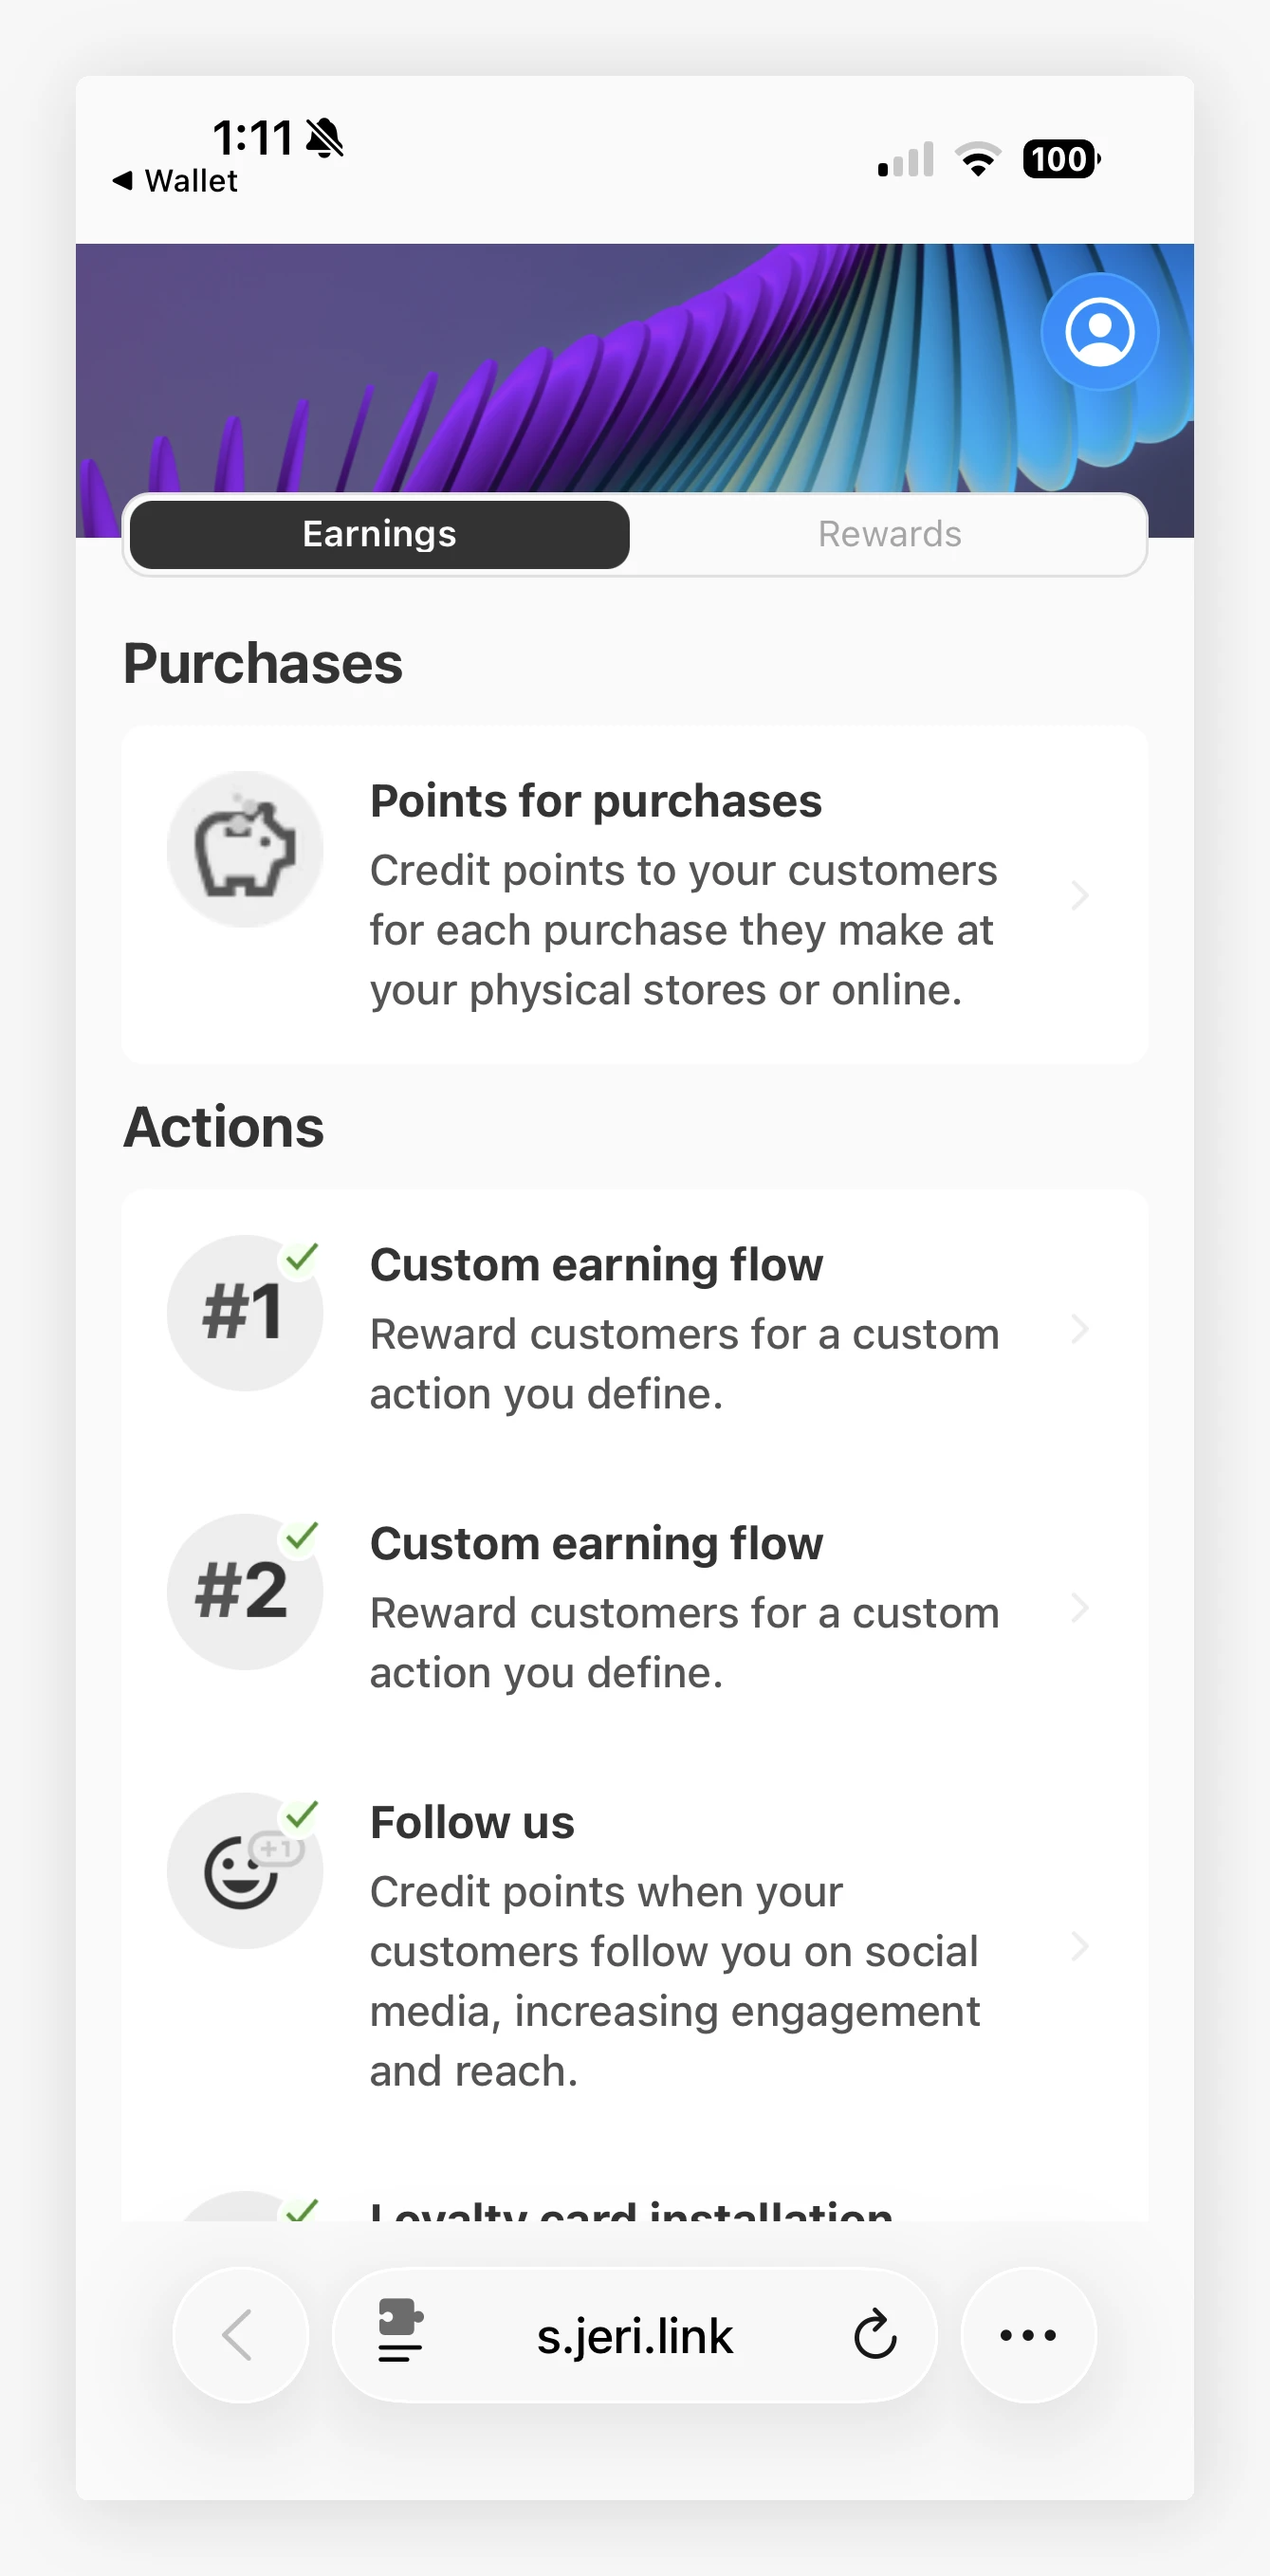
Each card shows:
- The flow title and subtitle in the customer's language
- The points the customer can earn
- The button you defined, if you picked Tap to earn or Tap and external trigger
- A "You already earned this" tag once the customer hits the max execution for the current window
Edit, Deactivate, or Delete 
From any saved custom flow, you can:
- Save: keep the flow in its current state.
- Status: choose Active or Inactive, then click Save to show or hide the flow in the customer webapp.
- Delete: remove the flow entirely and free up its slot.
Deactivating a flow stops new executions but keeps the configuration. Deleting a flow removes it for good. Customers who already earned points through that flow keep the points; only the flow itself disappears.
Standard earning flows (purchases, social follows, profile completion, etc.) cannot be deleted. Only custom flows can.
Example: Reward a Product Review 
You want to give customers 100 points the first time they leave a review on your product pages.
Create the custom flow
Open a new slot. Set Points to 100, Recurrence to Lifetime, Max executions to 1.
Write the copy
Under Content, set the short description to "Tell us what you think and earn 100 points." Under Action, set the button text to "Leave a review" and the URL to your reviews page.
Pick Tap and external trigger
The button sends the customer to your reviews page, but only a published review should credit the points. Note the slot identifier (e.g. CUSTOM_2).
Wire up the trigger in Shopify Flow
Build a Shopify Flow that listens for your review app's "Review published" trigger. Add the Execute earning flow action from JeriCommerce. Set Earning flow name to CUSTOM_2 and Customer email to the email from the trigger.
Activate and test
Save and activate the flow. Submit a test review with your own account. JeriCommerce credits the 100 points the moment the review is published.
You are all set. The flow now runs end-to-end: the customer sees the action card, taps through to the review page, and earns the points once the review is verified by your review app.