This action sends a push notification to a customer's loyalty card in Apple Wallet or Google Wallet. It lands on the lock screen, like a message, so it's a good fit for order updates, reminders, and personal offers sent at the right moment.
Each notification goes to one customer. To send a message to a whole group at once, use a scheduled campaign instead.
What happens 
- The notification is sent to every loyalty card the customer has installed, a few seconds after the action runs.
- Google Wallet shows the title and the message. Apple Wallet only shows the message, so make sure it reads well on its own.
- If you add a link, the customer opens it by tapping the notification.
The notification is not sent when:
- Marketing notifications are turned off for your program.
- The customer turned off marketing notifications, hasn't installed their loyalty card, or has removed it.
Keep the text short. The lock screen only shows a few lines, and nothing shortens long text for you. For more on timing and personalization, see Notification delivery strategies.
Set it up 
Use the JeriCommerce Send push notification action in any Shopify Flow workflow, for example after a purchase or when a customer gets a tag.
Add the action
In Shopify, open Flow, create or edit a workflow, and add the JeriCommerce Send push notification action after your trigger.
Fill in the fields
- Email: the customer's email. Use Add variable to pick it from the trigger, such as the customer's email.
- Push title: the title. Only Android devices show it.
- Push content: the message, shown on every device.
- Push URL (optional): the page the notification opens.
Turn on the workflow
Save and turn on the workflow. A notification is sent each time the trigger runs.
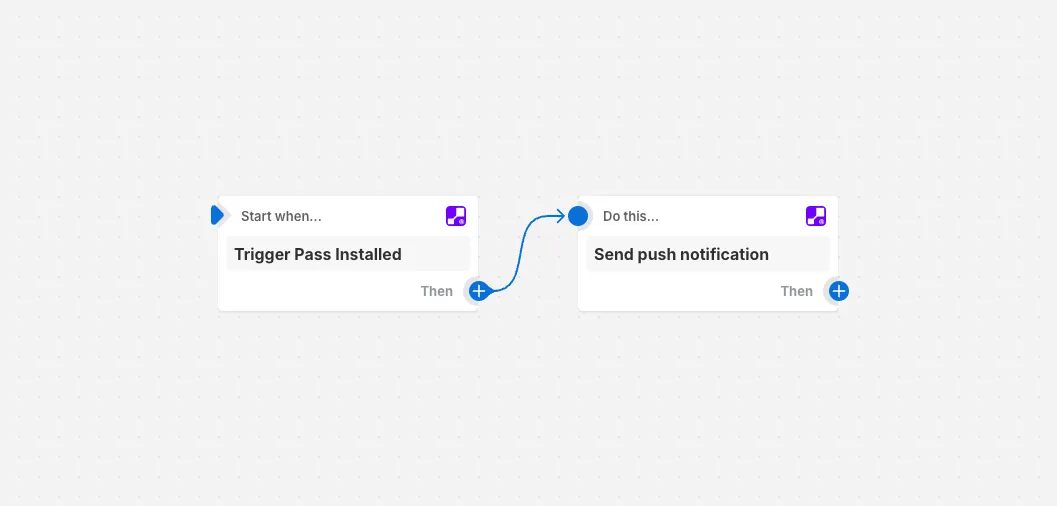
If marketing notifications are turned off for your program, or the email doesn't belong to a customer, the step fails and Shopify Flow shows the error in the workflow's run history.
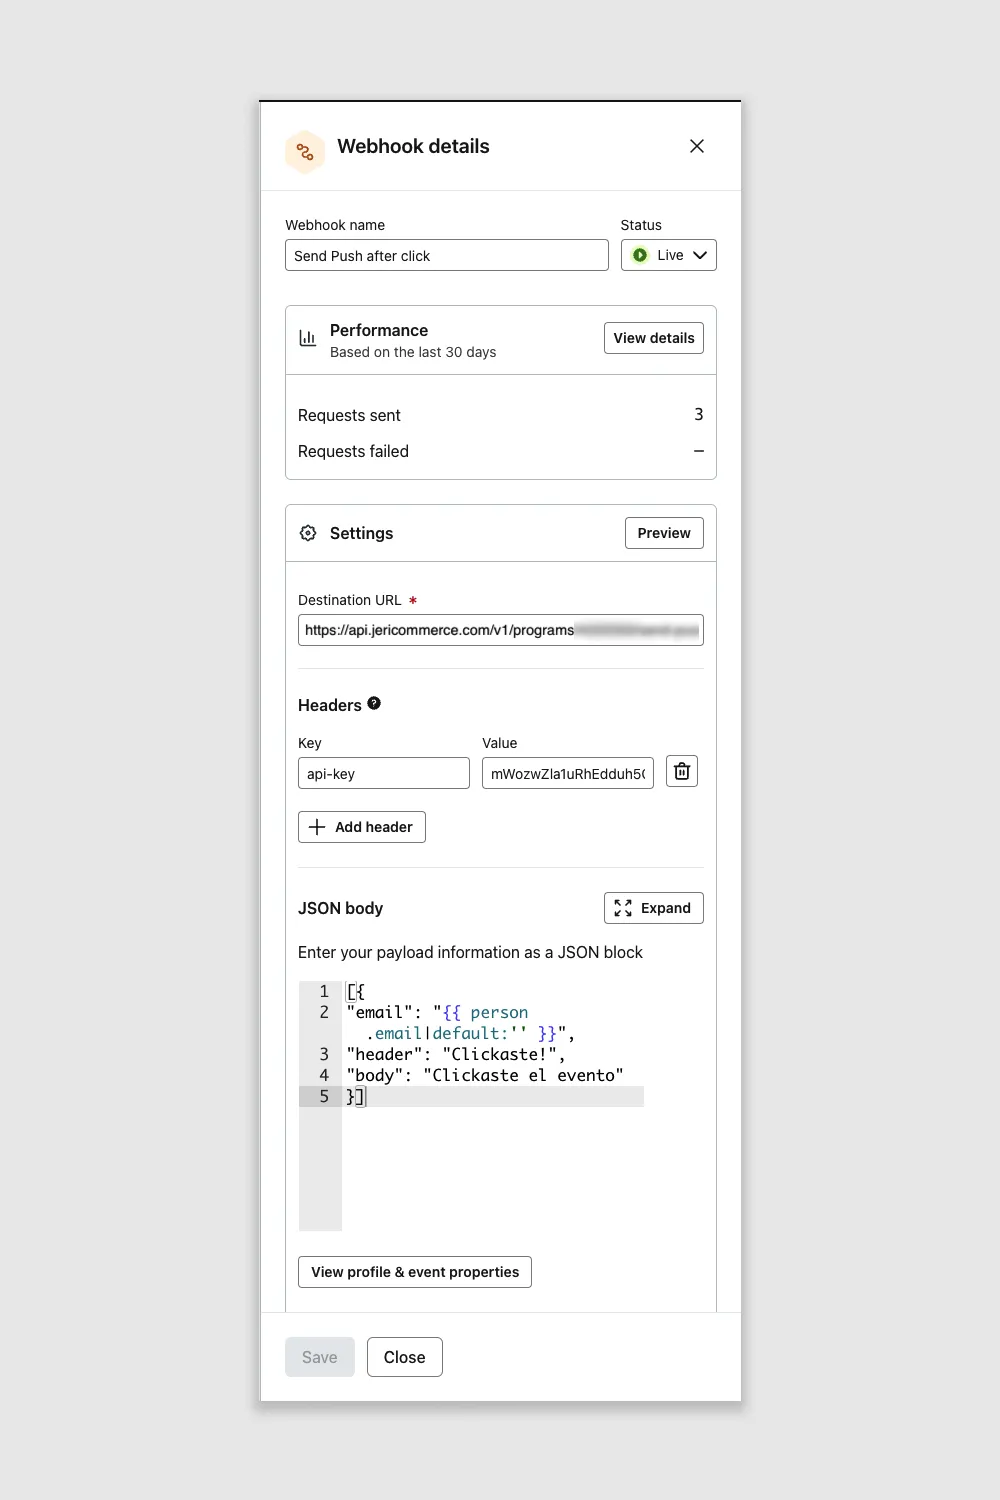
Add a Webhook action to your Klaviyo flow. Fill in the builder below and copy each value into the webhook settings: the Destination URL, the api-key header, and the JSON body.
Your details
Find it in Settings > Technical > Program Information.
Create one in Settings > Technical > API Keys. It stays in your browser.
Action details
The page the notification opens when the customer taps it.
Copy and paste into Klaviyo
https://api.jericommerce.com/v1/programs/your-program-slug/send-pushapi-keyyour-api-key[
{
"email": "{{ person.email|default:'' }}",
"header": "",
"body": ""
}
]The body is always a JSON array (wrapped in [ ]), even for a single notification.
Klaviyo and JeriCommerce both use {{ }} for variables. To avoid conflicts, write JeriCommerce variables with <% %> inside a Klaviyo webhook:
| System | Syntax | Example |
|---|---|---|
| Klaviyo | {{ variable }} |
{{ person.first_name }} |
| JeriCommerce | <% variable %> |
<% first_name %> |
| On-device (wallet) | %%variable%% |
%%balance%% |
Use Klaviyo's syntax for profile data (email, name) and JeriCommerce's syntax for loyalty data (balance, tier).
POST https://api.jericommerce.com/v1/programs/{program_slug}/send-push
Send your API key in the api-key header. See Authentication through the API. The body is an array of up to 100 notifications:
[
  {
    "email": "customer@example.com",
    "header": "Your order is on its way",
    "body": "Track it from your loyalty card.",
    "link": "https://yourstore.com/account/orders"
  }
]
| Field | Type | Required | Notes |
|---|---|---|---|
email |
string | Yes | Email of the customer who receives the notification. |
header |
string | Yes | The notification title. |
body |
string | Yes | The notification text. |
link |
string | No | The page the notification opens when the customer taps it. |
The API answers 201 with an empty body as soon as the request is valid, and the notifications go out about 10 seconds later. Skipped notifications are not reported. See queued endpoints.
| Code | Status | Meaning |
|---|---|---|
MAX_ITEMS_PER_REQUEST_EXCEEDED |
400 |
The array has more than 100 items. |
| Validation errors | 400 |
email, header, or body is missing or empty. |
Build a ready-to-run request with your own values:
Your details
Find it in Settings > Technical > Program Information.
Create one in Settings > Technical > API Keys. It stays in your browser.
Action details
The page the notification opens when the customer taps it.
Your request
curl --request POST \
  --url 'https://api.jericommerce.com/v1/programs/your-program-slug/send-push' \
  --header 'api-key: your-api-key' \
  --header 'Content-Type: application/json' \
  --data '[
  {
    "email": "customer@example.com",
    "header": "",
    "body": ""
  }
]'
Paste it in a terminal to test the request with your program.