If your customers speak different languages, you can translate the sections on the back of your loyalty card so each customer sees content in their preferred language. JeriCommerce supports English, Spanish, German, French, and Italian, and the same language settings also apply to rewards, earning flows, and automatic notifications.
Translated sections appear automatically on both Apple Wallet and Google Wallet passes based on the customer's device language.
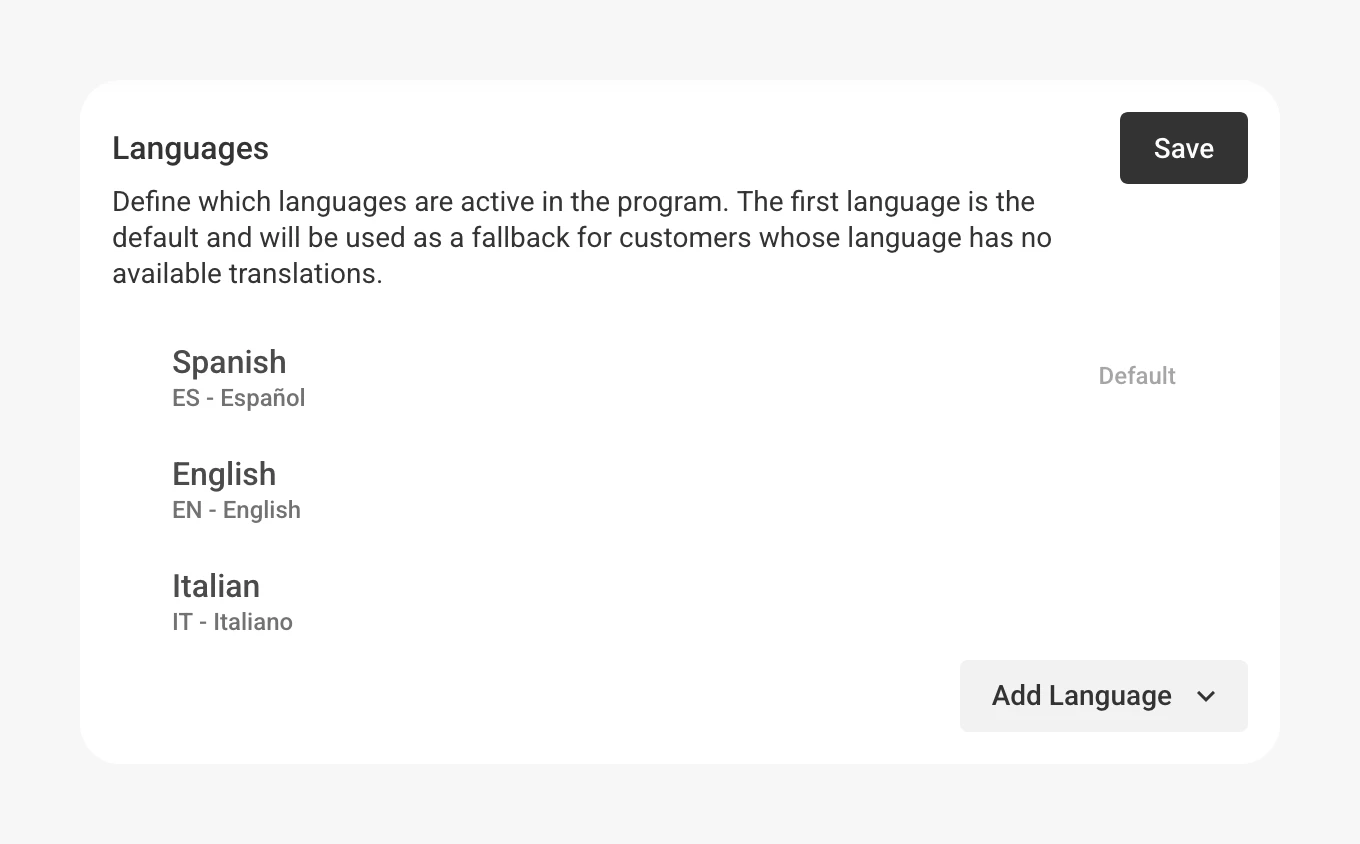
Set up your program languages
Before you can translate sections, you need to add languages to your program. The first language in the list is your default — the one customers see when no translation is available for their language.
Open language settings
Go to Settings → Customer Flows → Languages in the JeriCommerce admin.
Add a language
Click Add language and pick from the available options: English, Spanish, German, French, or Italian.
Reorder languages
Drag and drop languages to change their order. The first language becomes the default — this is the language your wallet sections are written in before any translations.
Remove a language
Hover over a language and click the three-dot menu to remove it. You can't remove the last remaining language.
Save
Click Save to apply your language settings.
Translate wallet sections
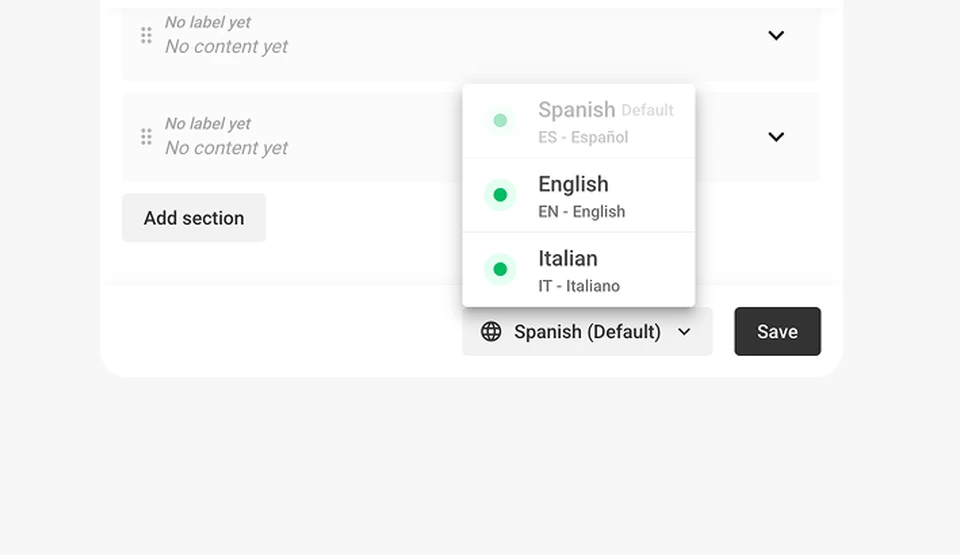
Once you've added at least two languages, a language picker appears in the wallet editor toolbar.
Open the wallet editor
Go to Customize → Loyalty card and switch to the Back view where your sections are.
Open the language picker
Click the language button at the bottom of the editor (next to Save). It shows your current language and a small colored dot if translations are incomplete.
Pick a language to translate
Choose a non-default language from the dropdown. Each language shows a status dot:
- Green — All sections are translated
- Blue — Some sections are translated
- Orange — No translations yet
The default language is always marked as Default and shows green.
Edit translations
The section editors switch to translation mode. Type the translated text for each section's Label and Content fields. The original text appears as a placeholder so you can see what to translate.
Save your translations
Click Save to store the translations. You can switch between languages to review and edit translations at any time.
Auto-translate missing sections
When you save wallet sections and some languages are still missing translations, JeriCommerce offers to auto-translate them for you.
Save with incomplete translations
Click Save while one or more languages still have untranslated sections.
Review the translation status
A dialog appears listing all your languages with their translation status — complete, partial, or not translated.
Choose auto-translate or skip
- Click Auto-translate to let JeriCommerce fill in the missing translations automatically
- Click Skip to save without translating — you can always come back and translate later
How translations reach customers
Translated sections appear on wallet passes based on the customer's device language:
- Google Wallet — Uses localized headers and body text. Google automatically shows the version that matches the customer's phone language.
- Apple Wallet — Receives translated section content based on the customer's locale.
If a customer's device language doesn't match any of your translations, they see the content in your default language.