This guide explains how to set up and personalize the back side of a digital loyalty card by adding custom sections. You can use these sections to link customers to content, display helpful information, or show dynamic data like their name or membership number.
Step-by-Step Instructions
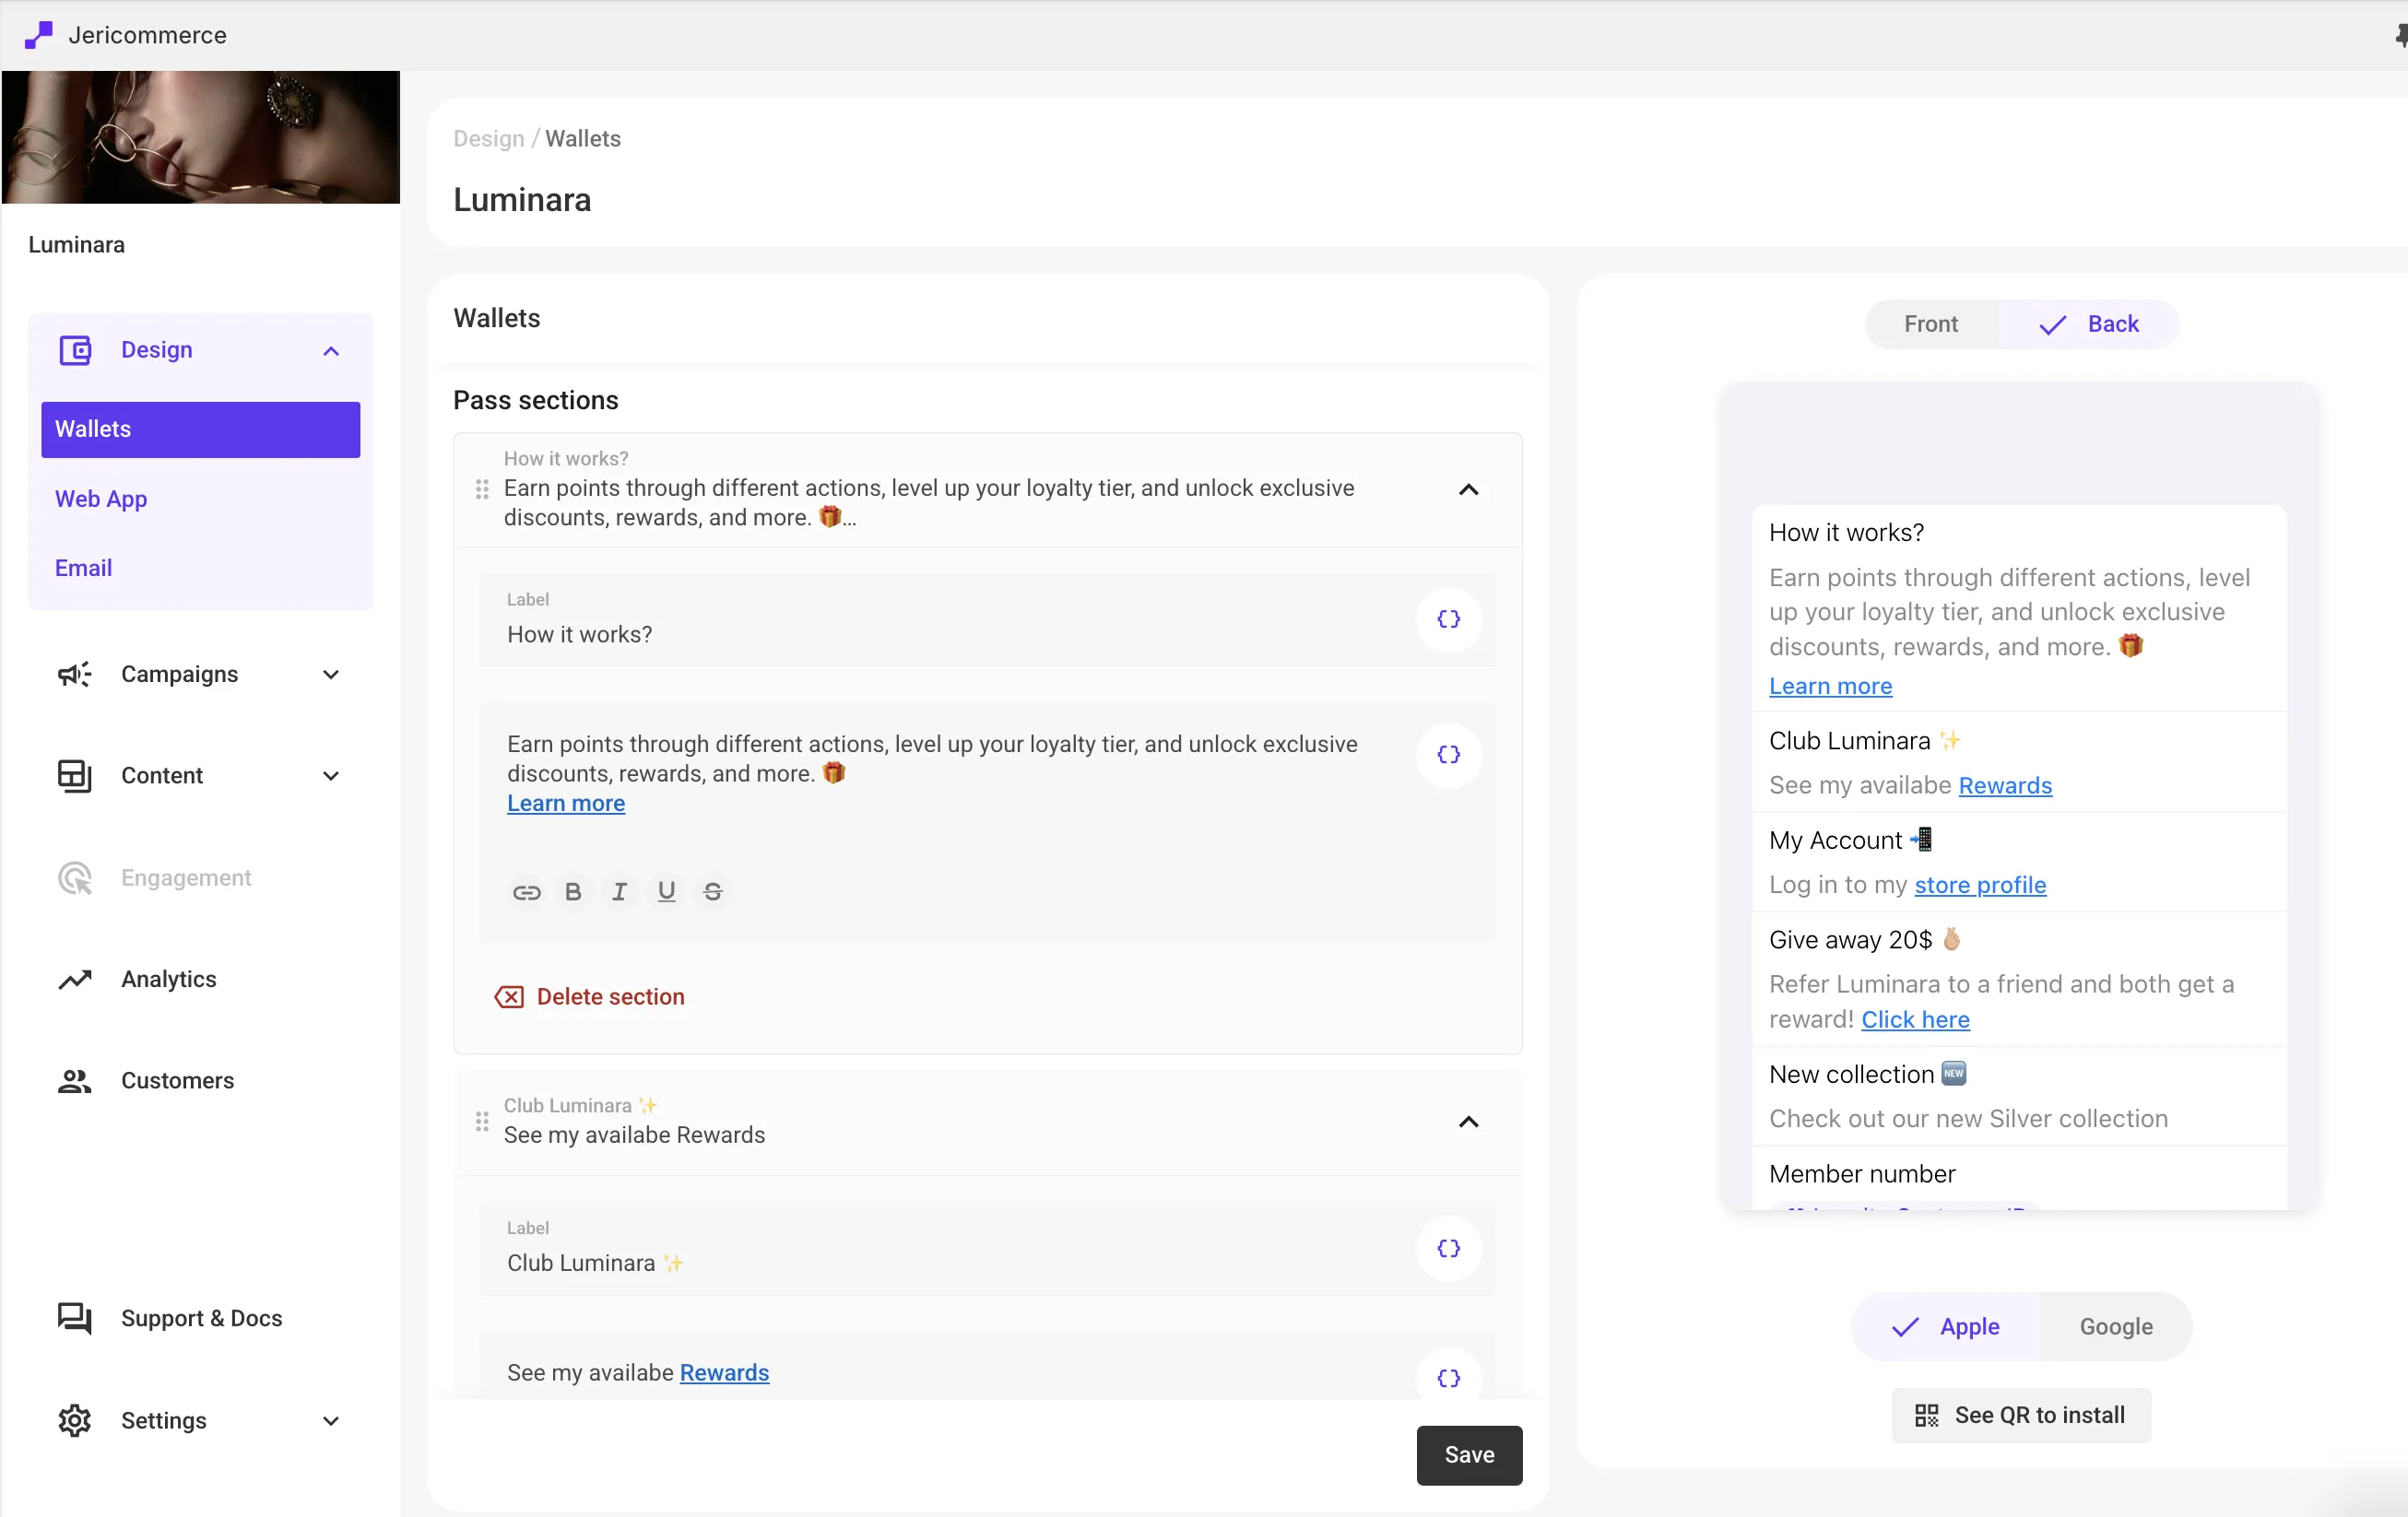
Switch to the Back View
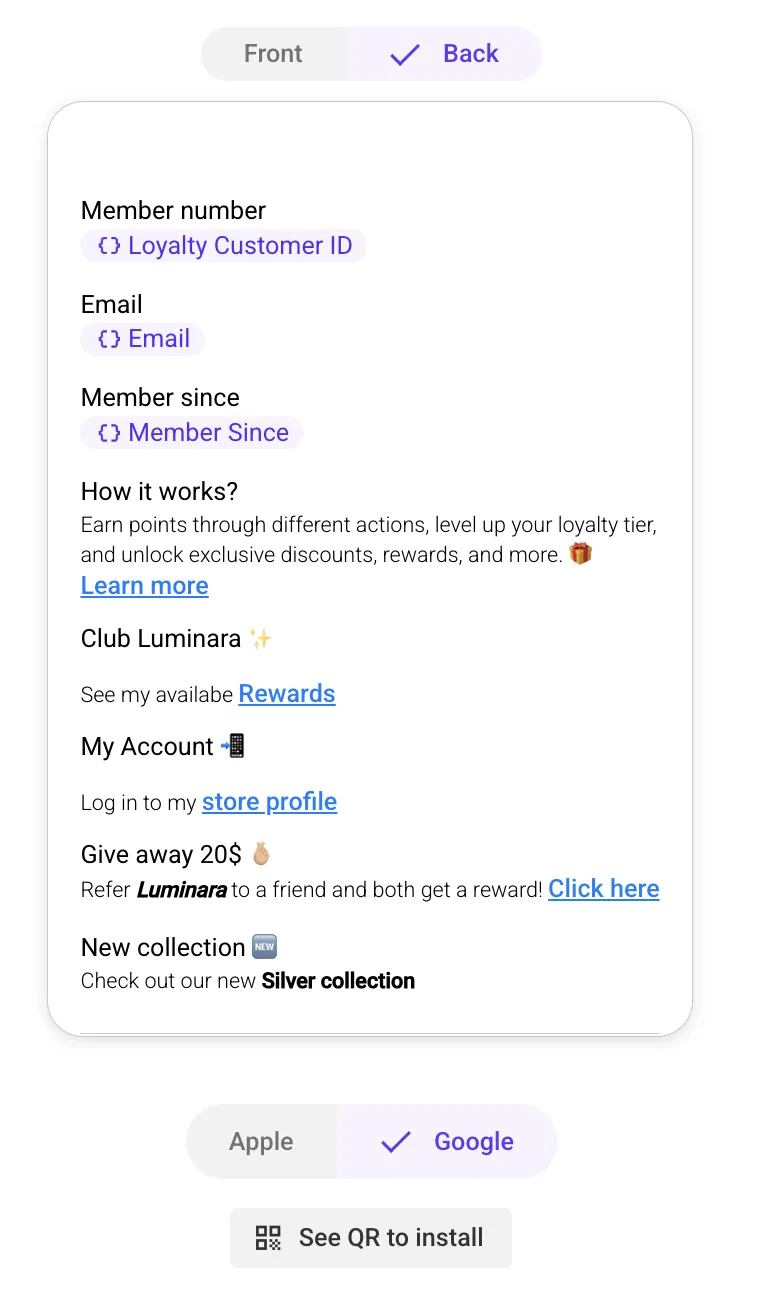
In the preview panel, click the "Back" tab to display the back side of the pass. This is where custom sections appear.
Add a New Section
Scroll to the "Pass sections" area in the editor and click "Add section". A new section will appear for editing.
Set Up the Section
Each section includes two fields:
- Label — The section title (e.g., Loyalty Program, Rewards, Your Profile).
- Content — The information or links you want to display. You can:
- Add plain text
- Insert clickable links
- Use formatting (bold, italic, underline, strikethrough)
- Bind dynamic fields (e.g., name, membership number) using the purple sync icon
Reorder Sections
Use the six-dot handle on the left side of any section to drag and reorder them. The order in the editor matches how they appear in the wallet.
Delete a Section
To remove a section, click the "Delete section" button at the bottom of that section.
Preview Your Changes
All changes update live in the preview on the right side. Use this to review how your pass will look before publishing. Switch between Apple Wallet and Android Wallet to check both devices.
Section Ideas
Here are some common use cases for the back of the wallet:
- Introduction to the Loyalty Program — A short explanation of how the program works and how customers earn points.
- Link to Rewards Page — "View available rewards" linking to a page where customers can redeem points.
- Link to User Profile — Let customers view or update their profile or account preferences.
- Referral Program — Include a link to invite friends and earn rewards.
- Nearest Store or Store Locator — Link customers to a map or store finder page.
- New Collections or Drops — Announce new product collections with a link to shop.
- Social Media Links — Encourage customers to follow your brand on Instagram, TikTok, or other channels.
- Customer Support — Add a contact link or help center article for assistance.