Your team often needs a quick answer about a customer or the program: how many points someone has, which coupon campaigns are running, or how this month compares with last month. With the Claude (MCP) integration, anyone on your team can ask Claude in plain language and get the answer from your JeriCommerce data. Claude can also act for you, like adding points or sending a push notification.
It works in Claude on the web, the desktop app and the mobile app. MCP (Model Context Protocol) is the standard Claude uses to connect to other apps. You don't need to know how it works to use it.
What Claude can do 
Claude can look up:
- A customer's loyalty details: points, tier, coupons, wallet passes and recent points activity
- Lists of customers, for example everyone in a tier or everyone with more than 500 points
- Your running coupon campaigns, your rewards and your custom earning flows
- Your program's analytics: the main metrics, insights and customer segments, with the same numbers as the Analytics dashboard
- The articles in this help center, so it can explain how to set something up in JeriCommerce
Unless you make it read-only, Claude can also:
- Add or remove a customer's points
- Assign a coupon to a customer
- Redeem a reward for a customer
- Run a custom earning flow for a customer
- Email a customer the link to install their loyalty card
- Send push notifications
Claude can't change your program settings, and it never sees phone numbers, birthdates or passwords.
Turn on Claude 
Open the Claude integration
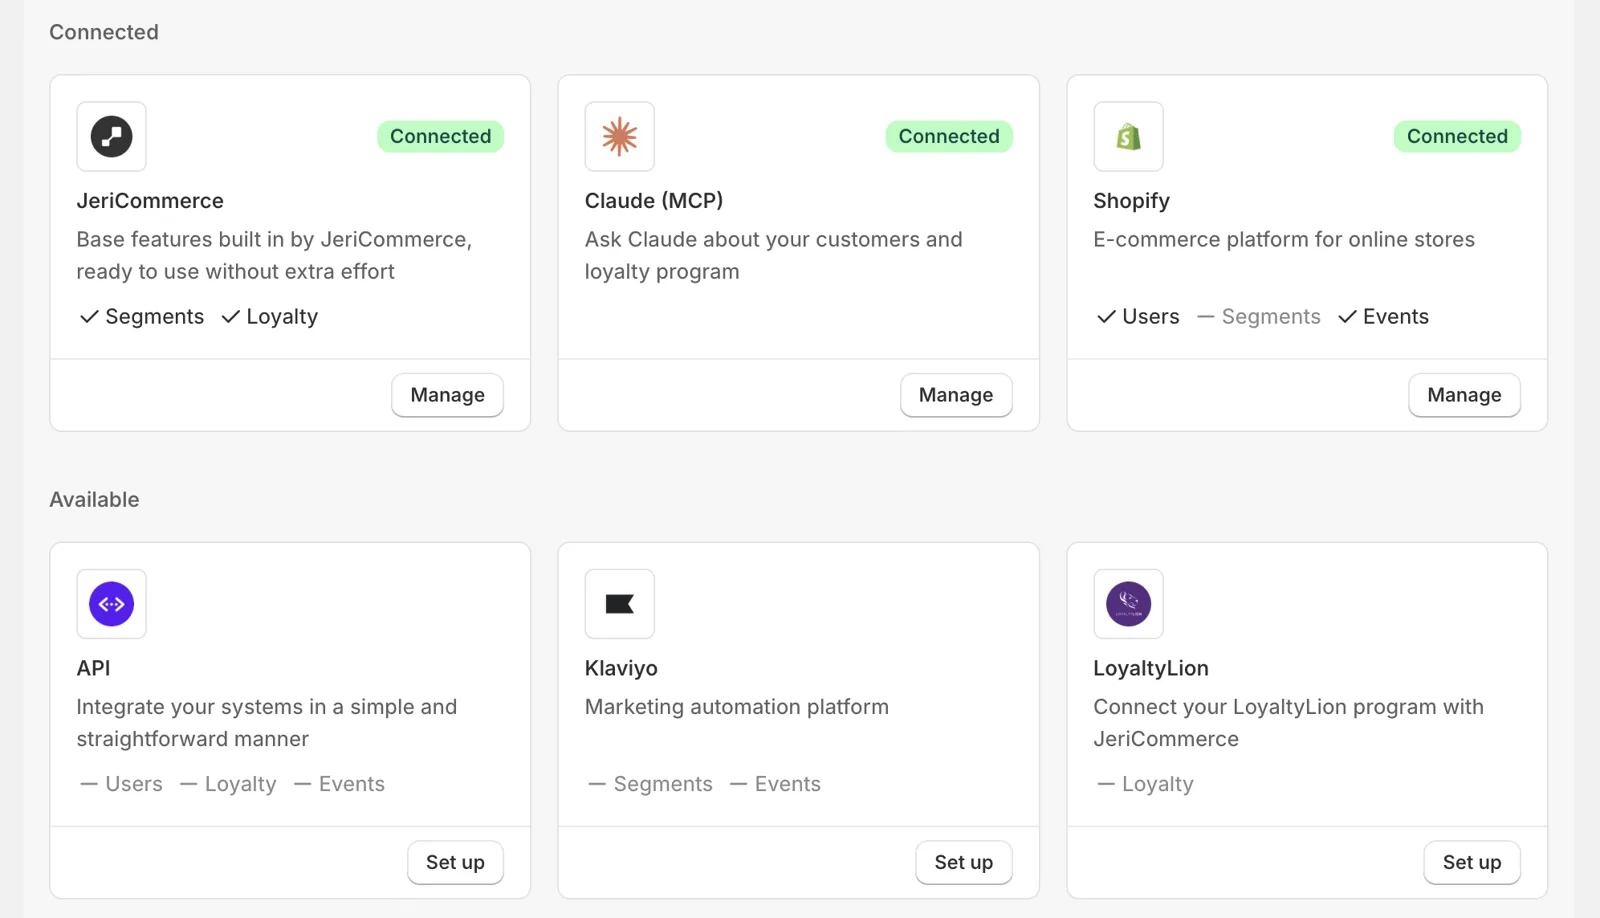
Go to Settings → Integrations and click Manage on the Claude (MCP) card.
Activate it
Read what Claude can look up and do, then click Activate. You'll see the message Claude activated.
Activating Claude only makes it available for your program. Nothing reaches Claude until a staff member connects it.
Connect Claude 
Each staff member connects Claude with their own Claude account and signs in with their own Shopify account. Claude then acts as that person, and you can see each connection in the admin.
Click Connect to Claude
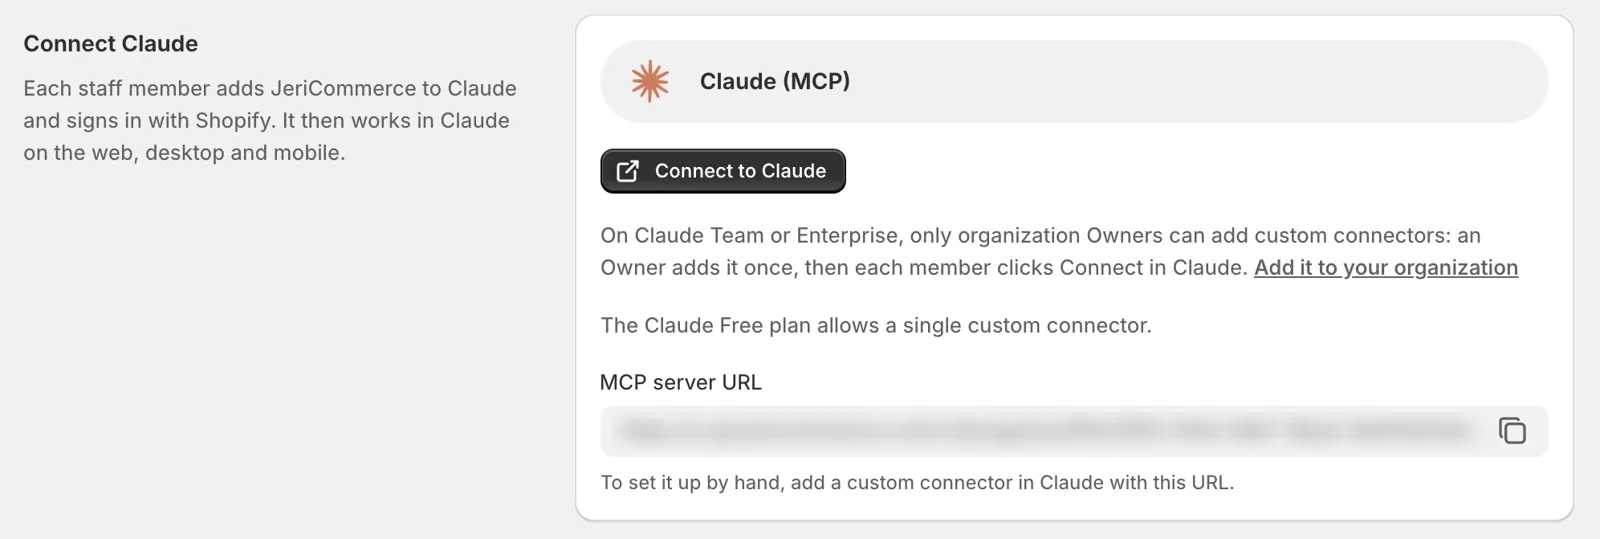
In the Connect Claude section, click Connect to Claude. Claude opens in a new tab with JeriCommerce ready to add.
Add it in Claude
Confirm in Claude to add JeriCommerce, then click Connect.
Sign in with Shopify
Sign in with your Shopify staff account for this store.
Allow access
JeriCommerce asks whether Claude can access your program and lists what it will be able to do. Click Allow. You're sent back to Claude.
Ask Claude
Start a chat in Claude and ask something like "How many points does anna@example.com have?" or "How did the loyalty program do this month compared with last month?"
The connection works in Claude on the web, desktop and mobile with the same Claude account.
On Claude Team, only organization Owners can add custom connectors. On Claude Enterprise, people with a custom role that includes Manage access to Libraries can add them too. One of them clicks Add it to your organization once, then each member clicks Connect in Claude. The Claude Free plan allows a single custom connector.
To set it up by hand, copy the MCP server URL with the copy button and add a custom connector in Claude with that URL.
Before Claude changes anything, such as points, coupons or notifications, it tells you what it's about to do. Depending on your Claude settings, it also asks you to confirm. Read the request carefully before you allow it.
See and revoke connections 
The Connections table lists every staff member who connected Claude to this program. For each one you'll see the Staff member, the Client, when they Connected, when it was Last used and their Permissions (Read or Read and write).
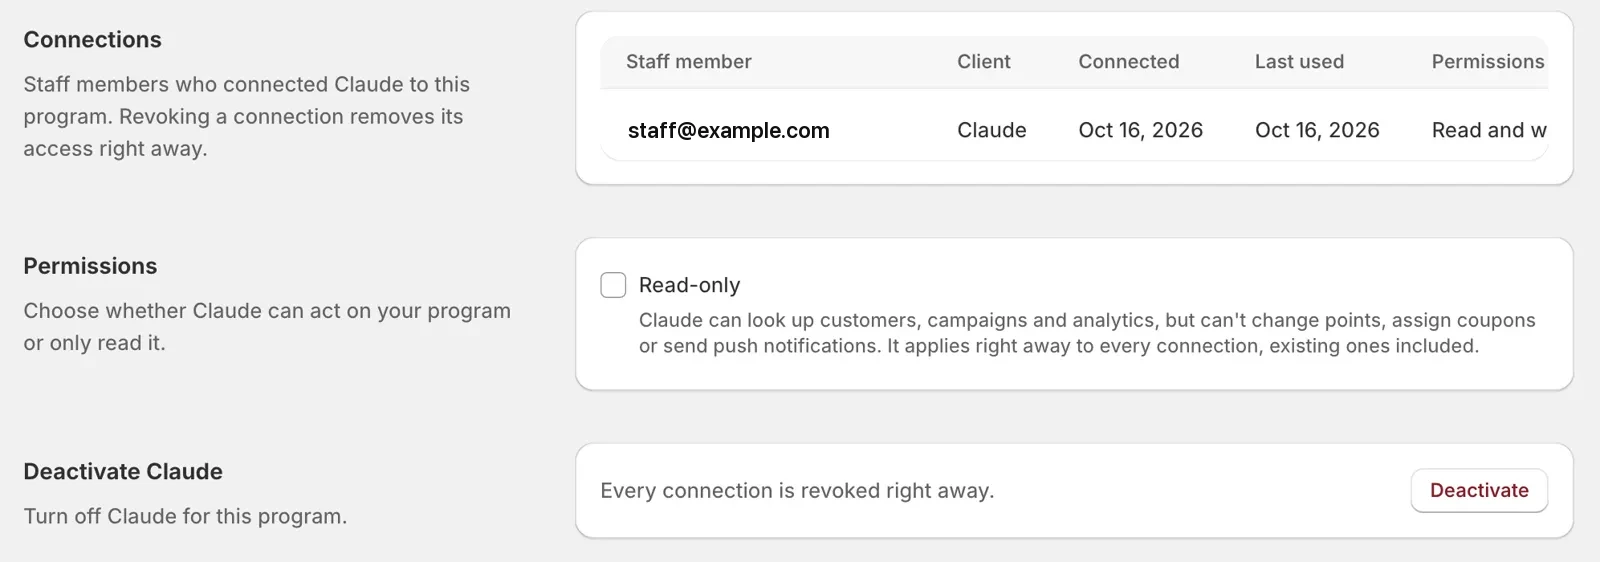
To remove someone's access, click Revoke on their row and confirm. They lose access right away and can connect again at any time.
Make Claude read-only 
If you want your team to look things up without changing anything, check Read-only in the Permissions section and click Save.
Claude can still look up customers, campaigns and analytics, but it can't change points, assign coupons, redeem rewards or send messages to customers. This applies right away to every connection, including the existing ones. Uncheck it to give write access back.
Turn off Claude 
To stop using Claude, click Deactivate in the Deactivate Claude section and confirm.
Deactivating revokes every connection right away. If you activate Claude again, each staff member needs to connect again.
Frequently asked questions 
Do I need an API key?
No. Each staff member signs in with Shopify, so nobody has to copy or share an API key.
Can Claude see other stores or programs?
No. A connection belongs to one program, and Claude only reads and changes that program.
Claude says JeriCommerce is not enabled
Check that Claude (MCP) is activated in Settings → Integrations. If it was deactivated, activate it and connect again.
Something new is missing in Claude
Claude keeps the list of JeriCommerce tools it already knows. Open Settings → Connectors in Claude, find JeriCommerce and sync its tools from the menu, or disconnect and connect again.
You're all set. Your team can now ask Claude about your loyalty program from wherever they work. If you'd rather work inside Shopify, you can also ask Shopify Sidekick about your loyalty program.