You can assign coupons to customers directly from a Klaviyo Flow using a webhook action. This lets you deliver wallet pass coupons based on any Klaviyo trigger — a purchase, a segment entry, an email click, or any other customer behavior.
For a deeper understanding of how coupon assignment works, see how to give a coupon to a customer.
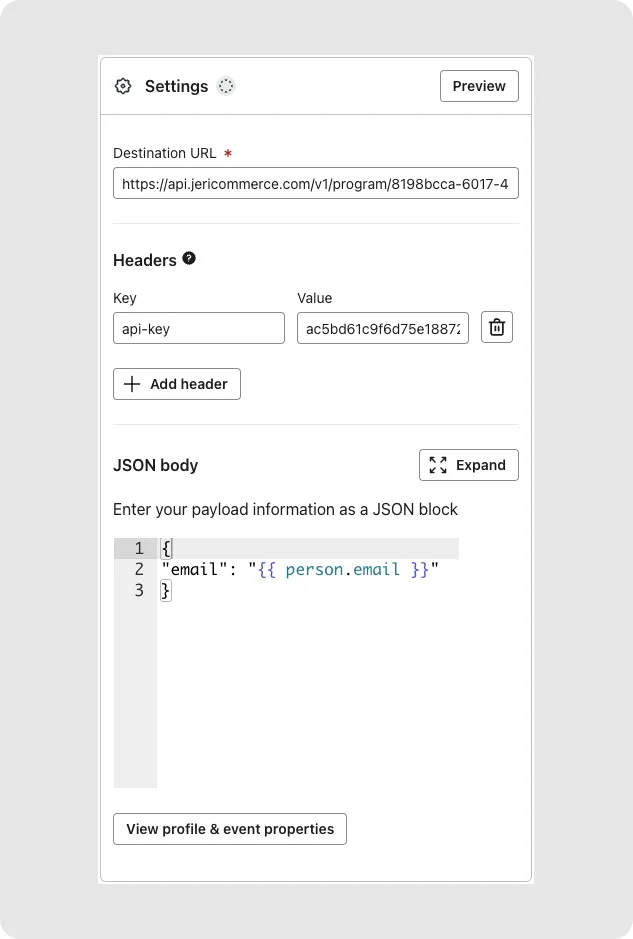
Set up the webhook
Get your API key and program slug
Go to Settings > Technical > API Keys and copy your API key. Then grab your program slug from Settings > Technical > Program Information.
Add a webhook action to your flow
In your Klaviyo Flow, click Add Action and choose Webhook.
Set the destination URL
Paste the coupon assignment endpoint. Your program slug goes where the placeholder is:
https://api.jericommerce.com/v1/programs/{program_slug}/coupon/assign
Add the API key header
In the Headers section, add:
- Key: api-key
- Value: your API key from step 1
Set the JSON body
The body is a JSON array with the customer's email and the coupon slug:
[
  {
    "email": "{{ person.email }}",
    "slug": "your-coupon-slug"
  }
]
Personalize the coupon message
You can overwrite the default coupon title at the moment of assignment. This is useful when you want to send a personalized message based on what happened in Klaviyo.
The coupon analytics are tracked as usual — you won't lose any tracking information.
[
  {
    "email": "{{ person.email }}",
    "slug": "your-coupon-slug",
    "title": "{{ person.name }}, here is a gift for your loyalty"
  }
]
{{ person.first_name }} or {{ event.product_name }} to make each coupon feel personal, not generic.